
Firmware Flashing
Flash firmware onto your 35T, 75T, or 100T DMA card using the CH347 flashing tool. This guide covers the full process from connecting your card to verifying a successful flash.
⚠️ Flashing must only be done on your 2nd PC — NOT the Game PC.
📦 Test BIN Downloads
Use these only to verify your card and flashing tool are working. Do not use test firmware in games with DMA checks — it will get you banned.
🔌 1. Prepare Your Game PC
- Fully shut down your Game PC.
- Flip the power supply switch to OFF.
- Press the power button several times to drain residual power from the capacitors.
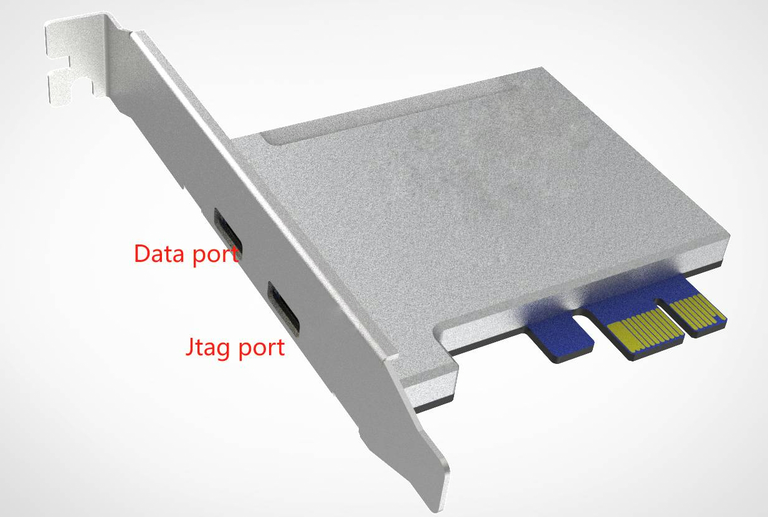
🧷 2. Connect the JTAG Cable
- Locate the JTAG port on the DMA card — this is the port closest to the motherboard.
- Connect the USB cable securely from the JTAG port to your 2nd PC.
📥 3. Download Flash Files
Save both files to a folder with no spaces in the path — e.g. C:\DMA_Flash
🧰 4. Install JTAG Drivers
- Open the CH341PAR folder from the downloaded driver.
- Right-click
SETUP.exeand select Run as Administrator. - Click Install.
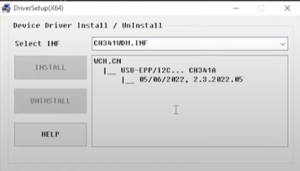
Open Device Manager and confirm the device appears correctly:

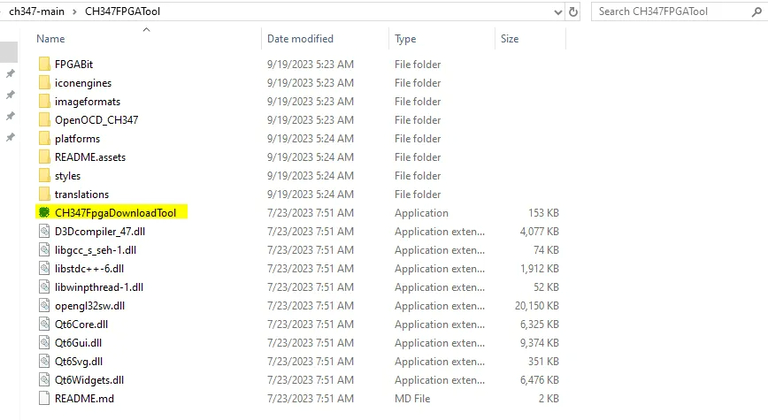
⚙️ 5. Launch the FPGA Tool
- Open the CH347-main folder.
- Navigate to the FPGATool folder.
- Right-click CH347FpgaDownloadTool and select Run as Administrator.
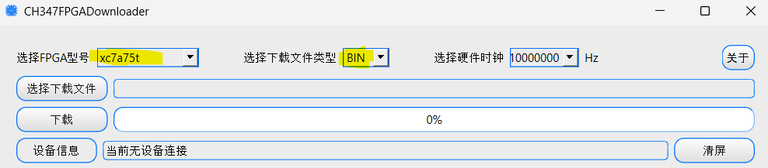
🎯 6. Select the Correct Chip
In the FPGADownloadTool, set the first and second dropdowns to match your card:
xc7a35t
xc7a75t
xc7a100t
Also set Field 2 to BIN and Field 3 to 10000000 (for 75T/100T).
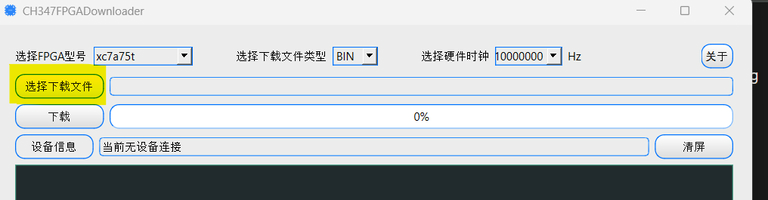
📂 7. Select Your Firmware File
- Click the file selection field next to the FPGA label.
- Browse to and select your
.binfirmware file. - Ensure the file path has no spaces.
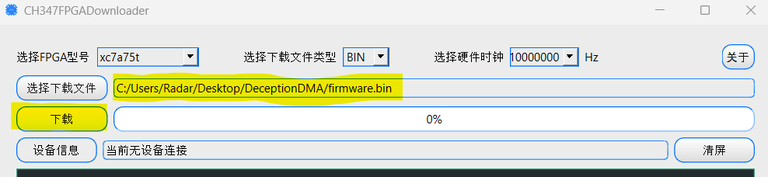
✅ C:\DMA_Flash\firmware.bin
❌ C:\DMA Flash\firmware.bin
▶️ 8. Flash the Firmware
- Click the Download button.
- Do not disconnect or power off during this process.
- Even if the progress bar reaches 100%, wait until you see the success message before continuing.

Wait for: Info: Close the CH347 — this confirms a successful flash.
🔧 9. Troubleshooting Flash Errors
If you see an error like jtagspi_init_chain_id proxy_bit or similar:
- Rename your firmware file to
firmware.bin. - Move both the firmware file and the flash folder to the root of your C: drive — e.g.
C:\firmware.binandC:\flash\. - Retry the flashing process.
🔄 10. Power Cycle & Switch to Data Mode
- Power off your 2nd PC, then your Game PC.
- Flip the Game PC PSU switch to OFF and press the power button a few times to drain residual power.
- Switch the USB-C cable from the JTAG port to the DATA port.
- Power on your Game PC first, then your 2nd PC.
🧹 11. Clean Up Old Firmware Traces
On your Game PC, remove any previous firmware traces to avoid conflicts:
- Download and run the Ghost Device Cleaner ↗
- Follow the on-screen prompts to complete the cleanup.
🚀 12. Run a Speed Test
Final step: Run a Speed Test to confirm your card and new firmware are working correctly.